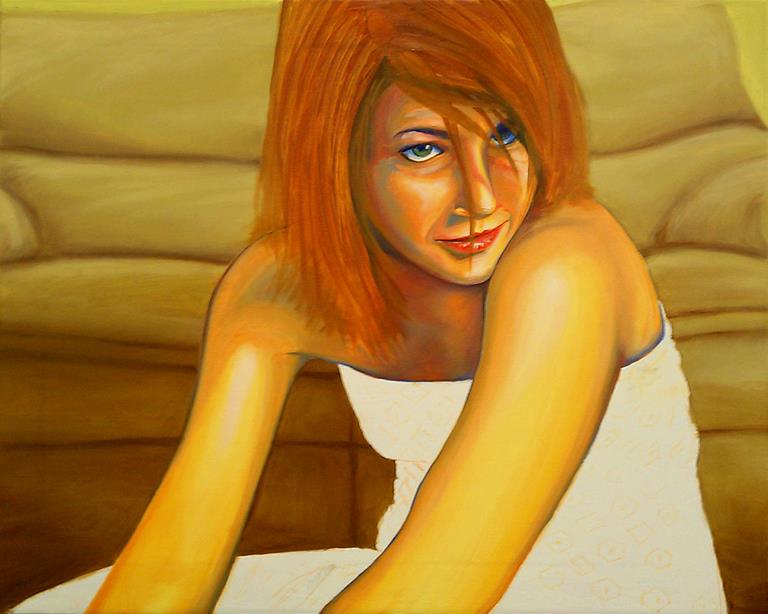
Many students enjoy seeing the process of building up a painting in stages. This painting, which was a portrait of a girl based on a photograph of mine, was completed over approximately 5 weeks. Each stage was allowed to dry for about 1 week before the next layer went on. Not all oil paintings would normally require that much time to complete, especially portraits, but the number of hours actually involved in the painting process were between 12-15 so it only seems like a long time because of the extended drying time wait. The way I work normally 2-3 days would be fine between layers.
I first sketch lightly onto a prepared canvas, based on the photo reference. The initial paint brushed on is focused on the detail areas and main edges, particularly the face. The more edges and base details I can pain in during the initial stage, the closer I can get to my desired final result.
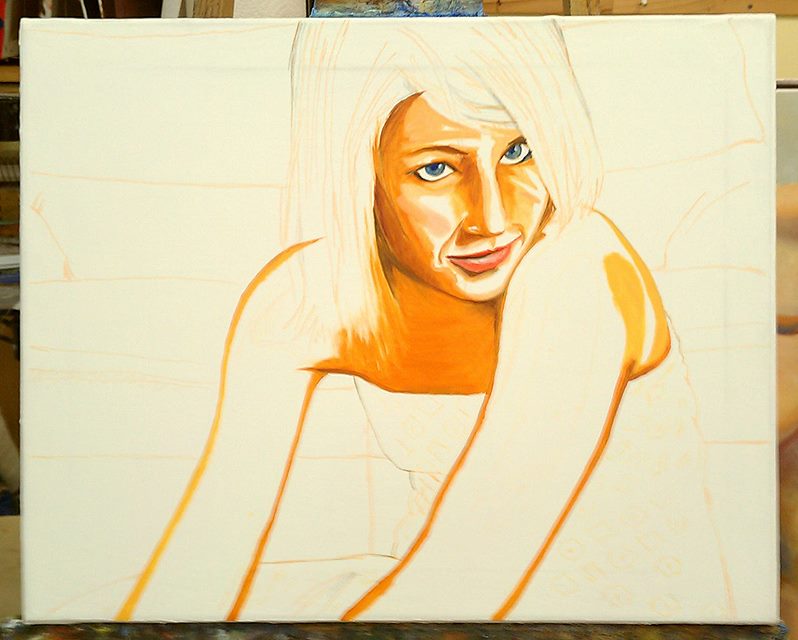
After a week, I mix in the major hues that will dominate the final painting and brush them into all the areas, leaving very little canvas still exposed. This second layer is still relatively thin. The couch needed to have softer edges to simulate being out of focus in the background so initially I paint the edges in hard and then soften them up carefully with a light brush and cross-hatching strokes. In this stage it’s OK if some brush strokes don’t perfectly follow the hard edge of foreground elements, as those edges can be more strongly defined toward the final stages.
The next stage I start to better define the detailed areas of the face and edges of the arms and am purposefully using complimentary colors. This will look odd at first until the future layers get worked in. When working on a portrait, it’s also preferred to stay away from brushing in hair color right away since the effect will look more natural when the bush strokes of paint are layered on top of the facial features.
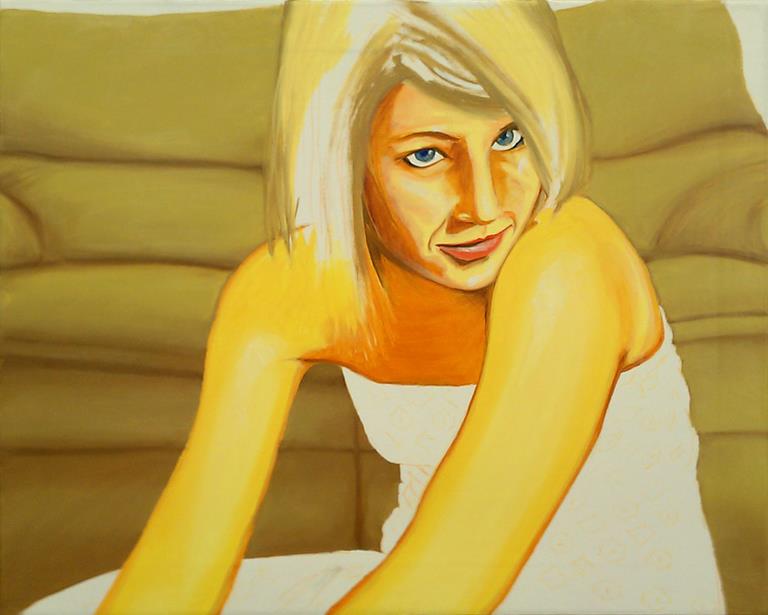
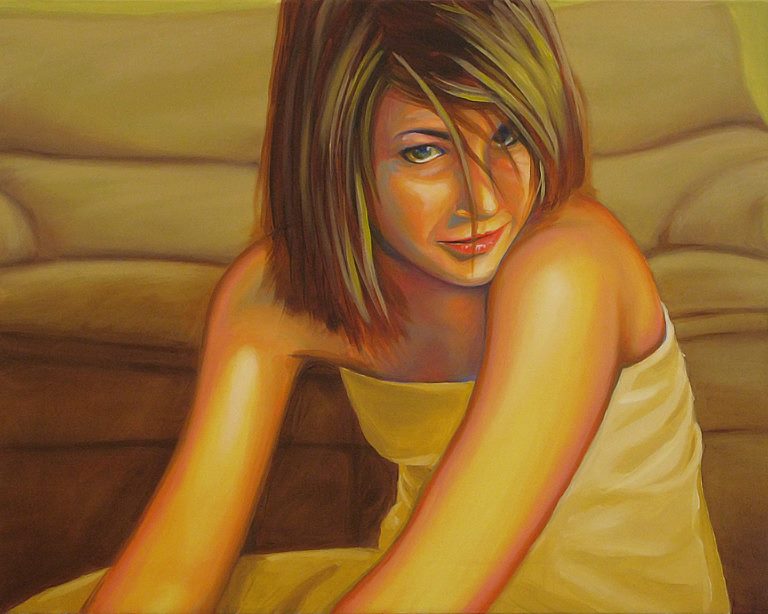
In the next stage I added more depth and texture to the background couch, added in a base coat for the hair (mostly glazed with heavy amounts of Liquin mixed in) and colored in the skin tone more solidly.
Getting close to completion, this next stage I added in the base color of the dress and blocked in the folding highlights and shadows. Although the dress is a different base color than the skin, as well as different than the background coach, it’s important that all the colors be mixed appropriately to present a balance of lighting. Meaning, even though each key area of the painting is made up of different base colors, the color choices in highlights & shadow areas needs to give the appearance that all elements are being lit by the same light sources in the same directions.
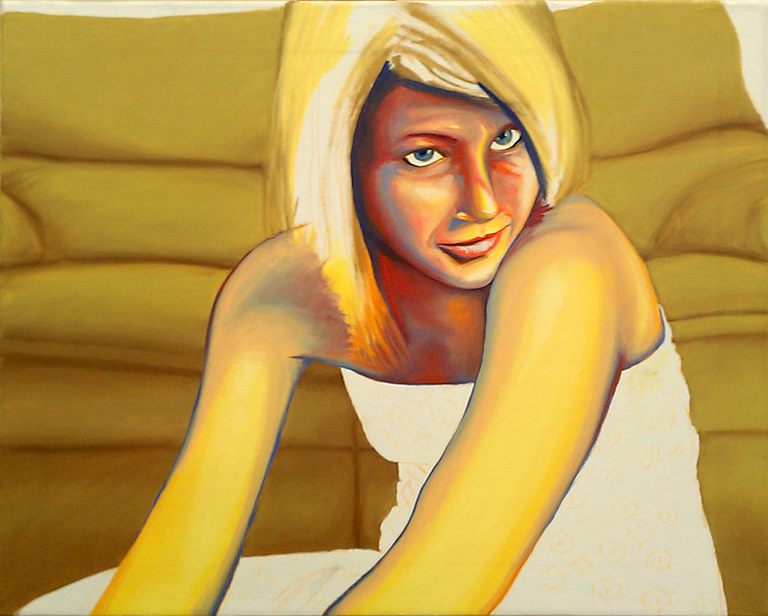
Since most of the work on the face is done, it’s now possible to add in the major hair strokes before final highlighting and shadows. Extra care was also taken on the eyes to enhance the emotion of the gaze. An glaze was worked into the background couch as well to further enhance the depth.
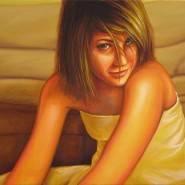
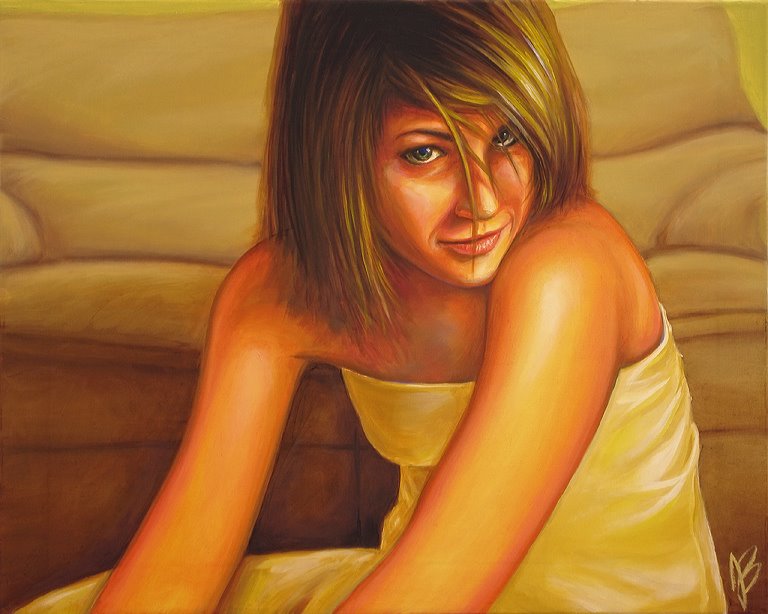
Here the final work is done. Most of the final painting involved glazes and pickup of areas where the glazing went overboard, as well as thick final layering of the hair and additional detail work on the eyes and subtle shadows around the face and arms. Lastly, white was delicately added to the key areas where the light strikes the rounded edges. Zinc white on the skin since it is more translucent and titanium white on the dress (with a bit of Liquin) since it is more opaque.
If you would like to learn how to paint portraits of your own, check out the class schedule and contact me to schedule your first lesson. I look forward to being your teacher!
Recent Comments